Thursday, June 29, 2006

The first milestone of the garage was reached. After 1.5 hours of work the brackets were drilled into the correct position, cut as required and deburred. The existing skeleton was checked for burrs and then riveted. The skin was measured and positioned. The next task will be to skin the stab and then move on to the elevator.


Project Status:
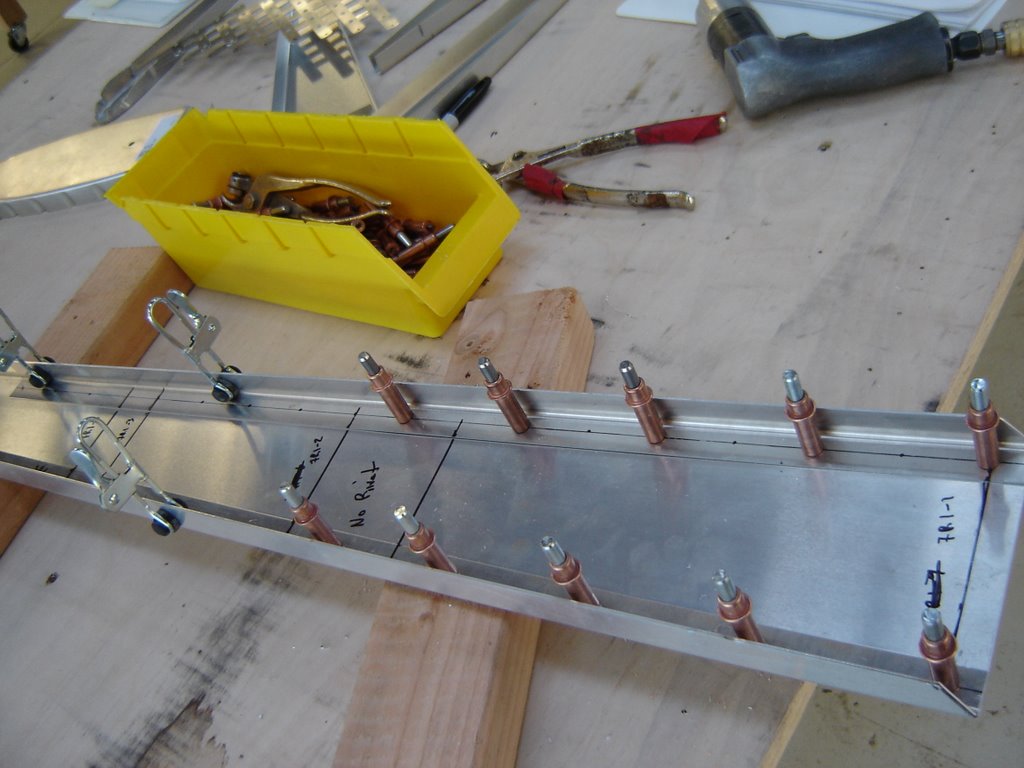
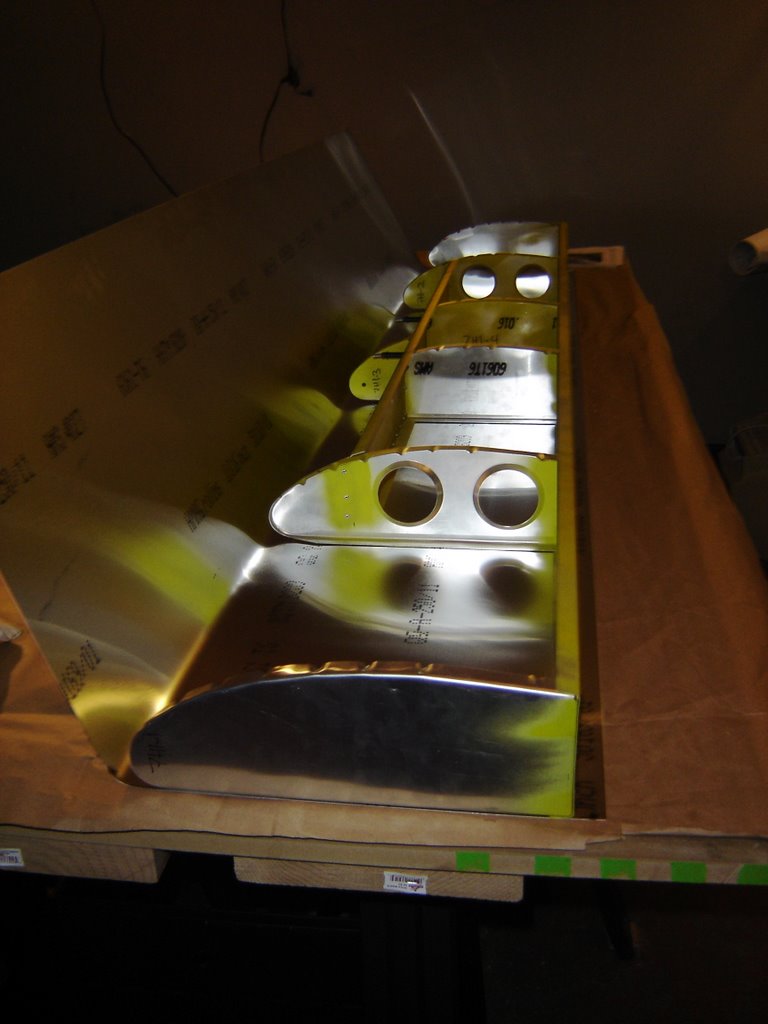
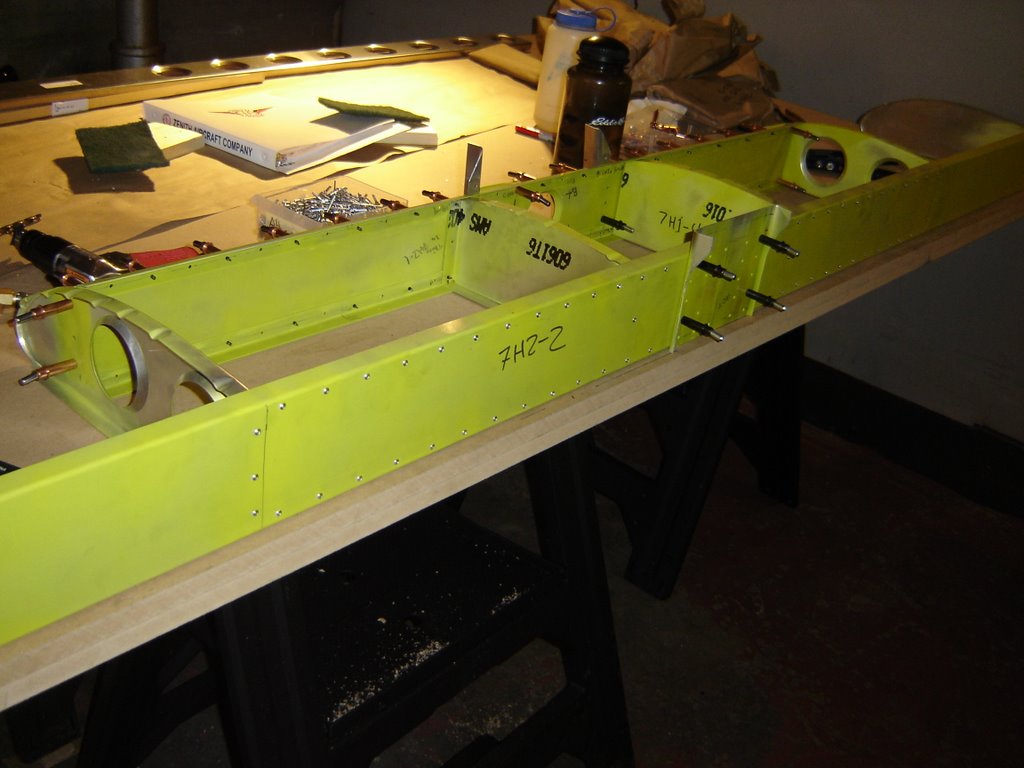
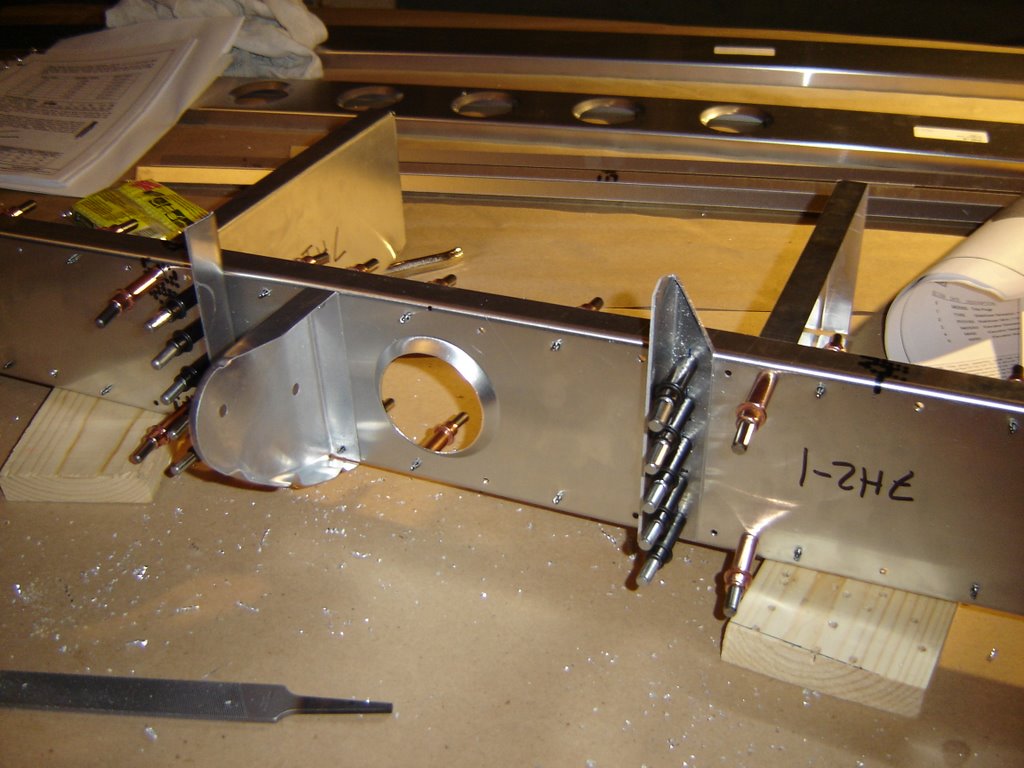
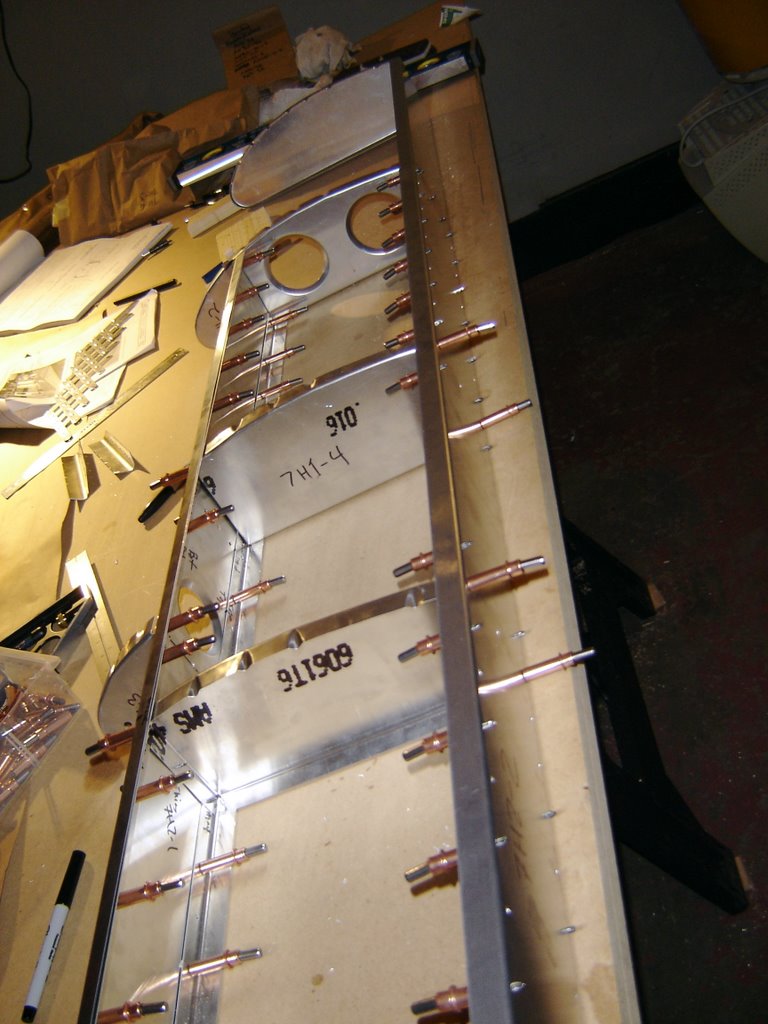
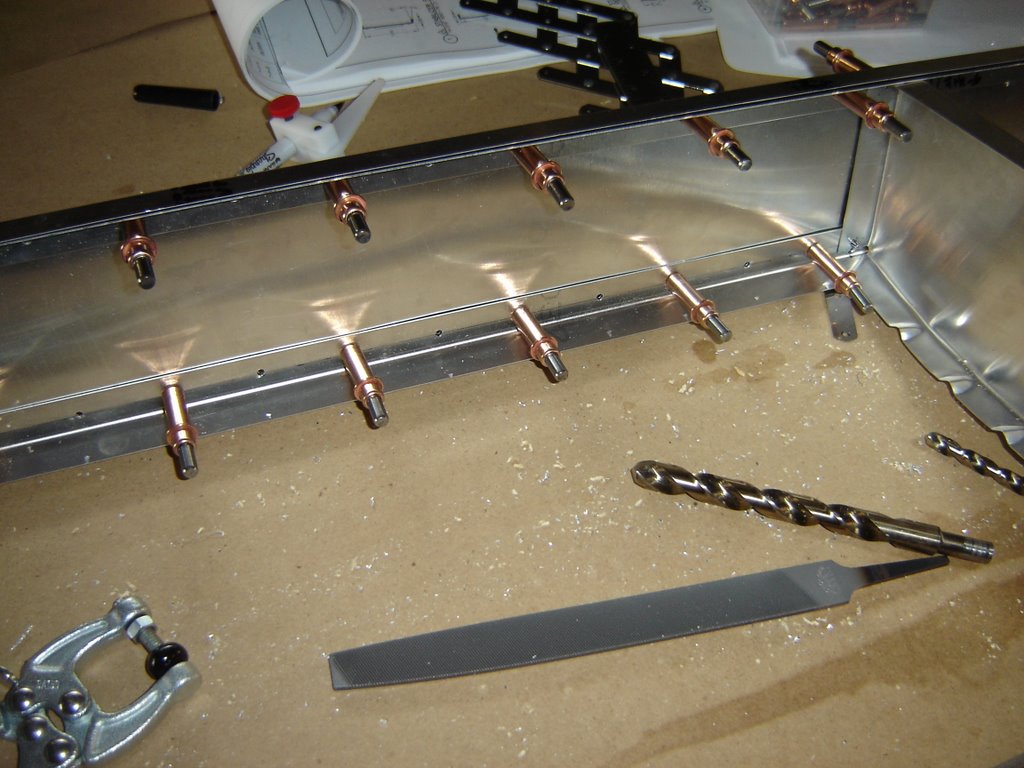
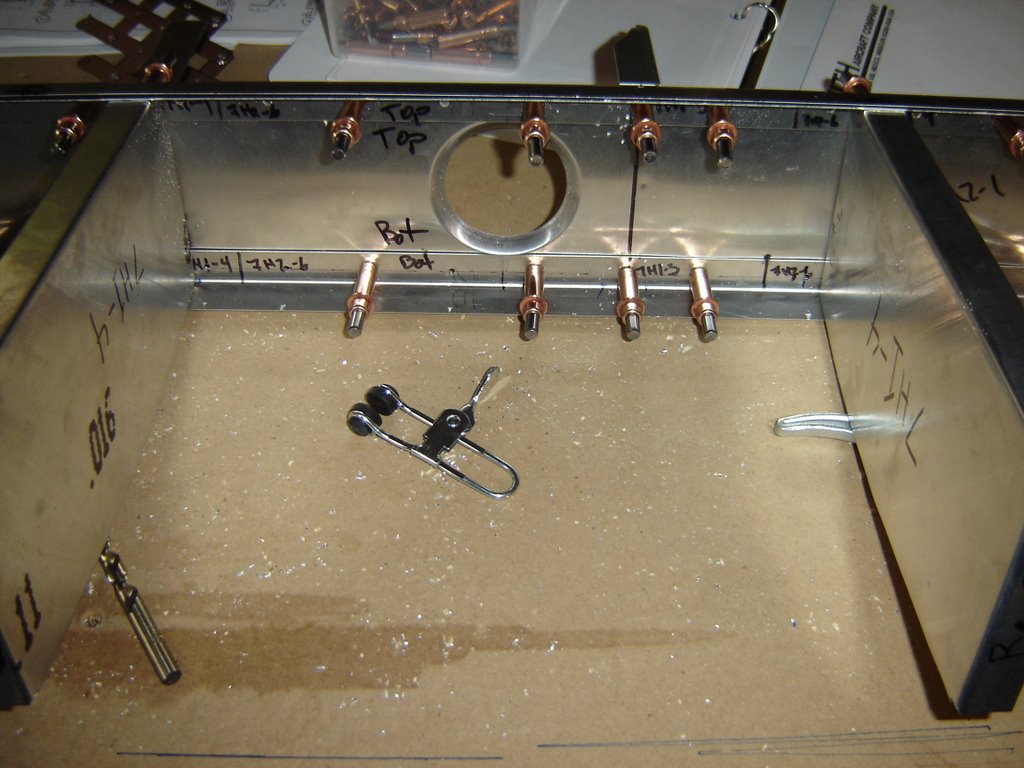
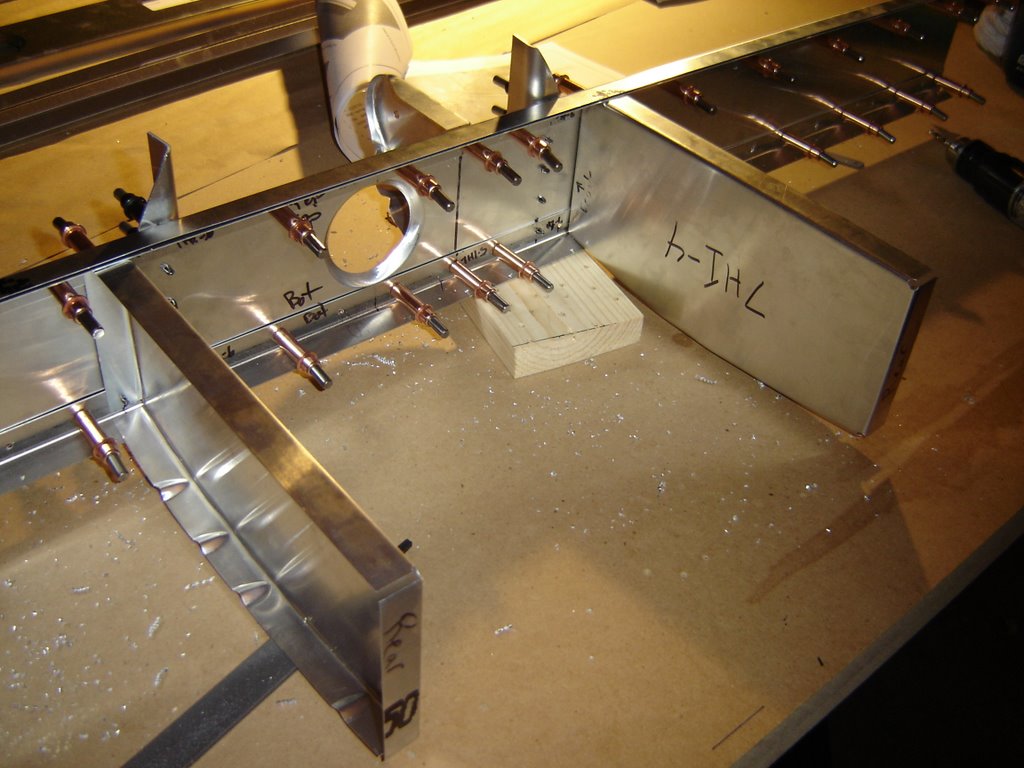
Horizontal Stabilizer: 16 hours spent, 3 pieces borked ( 3h, 2h, 2h, 2h, .5h, 1.5h, 3.5h, 1.5h )
Rudder Done, minus horn : ~16 hours spent, ( ~8h, ~8h )
Workshop Done: ~8 hours

Wednesday, June 28, 2006

The replacement brackets came in from Zenith! With company in from out of town it is a little harder to find the time to build, but I should be able to measure everything and drill tonight. Then check for additional deburring and then the riveting of the skeleton.

In other parts of the construction I found a great instructional book on Northwest native art. Although we may not be able to paint the plane ourselves, I at least want to design the scheme. The debate is between a thunderbird running down the entire length of the plane ( with the floats being painted like claws ) OR painted like an Orca.

Google Sketchup is a great tool for prototyping shapes quickly, so I'll build a 701 model and then create prototypes schemes and texture the model to see it from all angles.

Sunday, June 25, 2006

Snakes on a plane!

No building on Sunday due to a need to fly to Friday Harbor. At some point we collided with a stale internet meme.


Project Status:
Snakes: On a plane.

Saturday, June 24, 2006

The first rivets were set tonight. All parts were deburred with a file, then scotchbrite was used. Once the metal was smooth was used zinc chromate for the corrosion protection. Once we receive the replacement parts from Zenith we can rivet the entire structure and place the skin on the stabilizer.


Project Status:
Horizontal Stabilizer: 14.5 hours spent, 3 pieces borked ( 3h, 2h, 2h, 2h, .5h, 1.5h, 3.5h )
Rudder Done, minus horn : ~16 hours spent, ( ~8h, ~8h )
Workshop Done: ~8 hours

Friday, June 23, 2006

The good folks at Zenith ( I owe Caleb some beer if we ever meet ) confirmed the borkage and now riveting the skeleton must wait until Thursday at the earliest. The only way to fix the error is by replacing the 7H2-6s, clamping them in place, marking the holes and then drilling through the existing spar holes without widening the spar holes.

Until then I can drill the rear bracket into place, debur and corrosion protect the rest of the skeleton and then start on the elevator.


Project Status:
Horizontal Stabilizer: 11 hours spent, 3 pieces borked ( 3h, 2h, 2h, 2h, .5h, 1.5h )
Rudder Done, minus horn : ~16 hours spent, ( ~8h, ~8h )
Workshop Done: ~8 hours

While getting 7H2-7 ready I realized from the plans that I drilled both 7H2-6s upside down. Simply taking the parts, swapping sides and turning them upside down ( which would put them in the correct orientation ) will not work. Either the holes would be elongated past my level of comfort OR two holes will be unreasonably close to each other.

The only real option is to order replacements and wait to rivet the skeleton togther.

I guess I'll be starting the elevator's skeleton sooner than I thought.

Project Status:
Horizontal Stabilizer: 11 hours spent ( 3h, 2h, 2h, 2h, .5h, 1.5h )
Rudder Done : ~16 hours spent ( ~8h, ~8h )
Workshop Done: ~8 hours
Ric Romero: Reporting the obvious

Wednesday, June 21, 2006


Kitfoxes are nice little planes, especially the Series 7. When deciding on the right plane for the project the Series 7 was a strong contender with a large builder base and an active Matronics email list. Their were two problems with it. The first being the frame and fabric construction of the plane. Until recently I've only flown aluminum Cessnas and felt uneasy about fabric. The second was Skystar's bankruptcy.

After having flown a Super Cub and now that Kitfox is back ( http://kitfoxaircraft.com/ ) I have to rethink that choice a bit. The series 7 is a much faster cruiser and has similar short field/short lake capabilities.

I have to thank John McBean for taking the time to talk to me and also illuminating me about some issues involving the Jabiru 3300 and climb props. His thinking was that the Jabiru liked smaller diameter props since the high RPM of the engine would cause cavitation on anything over 62".

No matter what choice is made, I have to wish the best of luck to the McBeans and Kitfox Aircraft.
We are just starting, but I'm already thinking about engines.

After some research I'm starting to favor the idea of a Jabiru 3300 installation of the Rotax 912ULS or 914. The weight of the engine according to www.USJabiru.com is 40lbs heavier than the Rotax 912ULS, but the total weight of the install will probably be only 20lbs heavier. Combine the 20 extra ponies with no night flight restrictions and the removal of a redrive and I think we have a winner. It doesn't hurt that the Jabiru costs the same as the 100HP Rotax.

In an effort to save weight Jim from Jabiru Pacific suggested forgoing VORs in favor of a dash mounted GPS (Garmin 396), an EFIS and a Dynon. I was already considering the later two to save on clutter. That three instrument combo will even be cheaper than all the steam and vacum driven instruments, although a separate LRI will still need to be used.

This year Arlington may require two trips.
The Seattle Eastside EAA met tonight and we were treated to a fine lecture on the certification process. The talk was given by one of the two DARs in the Seattle MIDO.

I added up the lengths of all the (L) brackets and determined I had some good room, so I re-fabbed a questionable bracket for one of the horizontal stab's spars. The "ruined" piece was then used to test various methods of deburring ( file VS scotchbrite VS drill bit ) and to test the rivet gun Zenith supplied. About 15 minutes were spent.

Tuesday, June 20, 2006

Lesson learned.

Thanks to Max for this piece of advise:
"One thing I learned from this very list is to sleep on a mistake and fix it the next day. Extremely valuable advice, seems always to work..."

The desire to get things done may be driving to ask questions sooner than I need to. If I get the time tonight then one of the (L) brackets for the front may need to be re-fabbed, due to the drilling. All the enlarging of holes happened to the bracket instead of the rib or spar.

Monday, June 19, 2006

Not borked!.

I spent two hours making sure ( see update to the previous post ) that no borkage had occurred. A few holes did need to be widened, but since the rivets tend to expand out I don't think any problems will arise.

My thoughts now go to 7H2-7 and how to determine the cut that needs to be made. The instructions say to "cut to clear the elevator" but the elevator does not exist yet!

Tuesday the Seattle Eastside EAA has it's monthly meeting so work will have to happen again on Wednesday.


Now here is some real borkage courtesy of my childhood:


Project Status:
Horiztonal Stabilizer: 9 hours spent ( 3h, 2h, 2h, 2h )
Rudder Done : ~16 hours spent ( ~8h, ~8h )
Workshop Done: ~8 hours
Abe Vigoda: Alive
NOT Borked already ? !

Update:
After careful re-measurment with additional squares and clamps I have determined that I am not borked. The ribs were flexing at their hinges shifting when I moved the square. Note to self... buy more clamps.


When placing the rear spar ( 7h2-2 ) to 7h1-4 and and the other two ribs, is
it more critical to insure the ribs are at a right angle to the rear spar,
or that 7h2-2 is centered relative to the front spar ( 7h2-1 ).

With the other spar clamped down in it's "out of place" position the rear spar is level AND all three nose ribs touch the work bench evenly.

I already drilled one of the full length ribs so it is flush to the rear
spar doublers ( next to, not overlapping ), and everything is at a right
angle, but I noticed that one of the clamps on the other rib slipped and now
the other rib is about 10mm off from the doubler when at a right angle to
the rear rib.

Moving the rib that I already drilled 5mm doesn't seem like an option since
the holes and rivets would be very close.

It wasn't until peeking ahead into the next sections that I put together the fact that the front and rear spars should be aligned less the stabilizer be uneven on both sides or crooked!

I am waiting on a response from ZAC and I have received several good tips from the Matronics list for future issues to watch for, but no solutions yet.

Any suggestions?
Spent two hours more on the horizontal stab today. The rear spar was drilled along with both 7h1-4s and one of the other ribs ( 7h1-6? ). Monday I hope to get the second spar and the tip spars drille. Tuesday will be for double checking, deburring and chromating. Wednesday will be for riveting. Thursday will be for the first steps of skinning.


Project Status:
Horiztonal Stabilizer: 7 hours spent ( 3h, 2h, 2h )
Rudder Done : ~16 hours spent ( ~8h, ~8h )
Workshop Done: ~8 hours

Sunday, June 18, 2006

Progress!

After much organizing of the workshop, and taking of the inventory, work finally began on N701MH again. It has been several months since taking the workshop at Quality Sport Planes so the memory needed to be jogged a bit. Two sessions were done, the first lasting 3 hours, the second for two hours.

Cutting the thick aluminum brackets (7H2-6) took forever with the hacksaw. I have a high speed cutting tool, but the chuck is missing. The hack saw took at least 30 minutes alone. So far I am still happy with the kit, it seems to be about on par with the rudder kit, but I can not determine why those pieces would not have come already cut.

I was going to fly the C150 around, but found that the spinner was dented and scraped. I'm not sure how un balanced a dented spinner would make the propeller, so anyone with an idea please chime in. There are two likely scenarios 1) Another plane hit the spinner while parking 2) The fuel service truck damaged it.

UPDATE:
Two A&Ps took a look at the spinner and determined that the piece is still airworthy and that the damage is only superficial. The next time I have an oil change they will take off the spinner and reshape it. The scratches may have been caused by my engine block plug's "REMOVE BEFORE FLIGHT" warning label during a wind storm we had in Seattle several days prior.


Project Status:
Horiztonal Stabilizer: 5 hours spent ( 3h, 2h )
Rudder Done : ~16 hours spent ( 8h, 8h )
Worshop Done: ~8 hours

Friday, June 16, 2006

Scheduling:

My best guess is that the stabilizer and elevator will take about 50 hours to build. This estimate is based on values reported on other builder's websites. What I can not take into account is how often and for how long each person worked on their kit.

It seems logical that two hours two nights a week and 8 hours one day a week would produce "faster" results than 1 hour four nights a week and 4 hours two days a week. But since I do not know what everyone's work habits were ( I intend to log mine here for future builders ) I can only assume that 50 hours is 50 hours and that variance in my sample can account for varying work habits.

With that said, I hope with a minimum rate of 12 hours a week to have the elevator and stabilizer finished by July 14th, with the assumption that the Arlington EAA fly-in does not take away build time.

Thursday, June 15, 2006

We received the crate containing the horizontal stabilizer kit, the elevator kit, clecos, and various tools. The contents are still being matched to the inventory, but I already have some questions about (L) angles that the directions refer to as needing to be cut. Maybe a large extruded angle piece is included that I have not found yet and pieces just need to be cut as I go?

More tools were required from Home Depot, but an adapter nipple for the riveter is still needed along with ratchet straps to hold the skins in place later.

The workbench was revisited. I added a second layer to the table top and three supporting 2x8s underneath the entire run to keep the table from flexing. The two layers were screwed together and into the supporting 2x8s to keep them from shifting and to provide tensioning spots to help manage any twist that may develop. A large level was used to determine the flatness of the table and it's levelness. The garage floor was less than flat or level and that caused great pains when building the bench.

After a large amount of cleaning the workspace is now ready for the stabilizer.


Thursday, June 08, 2006

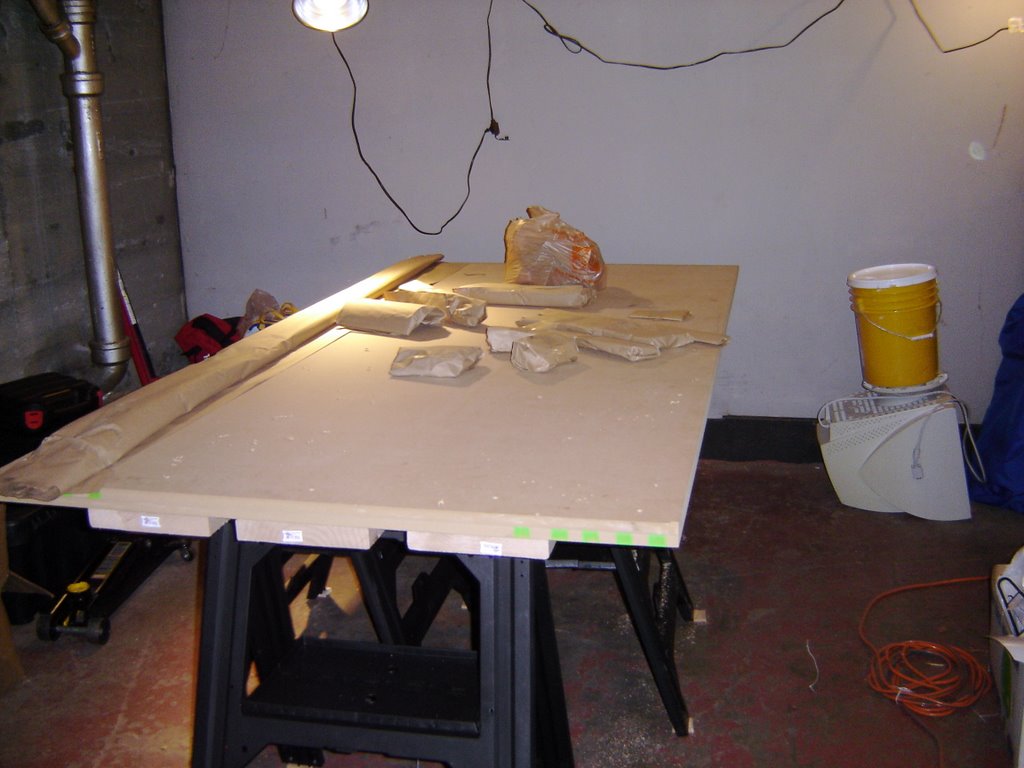
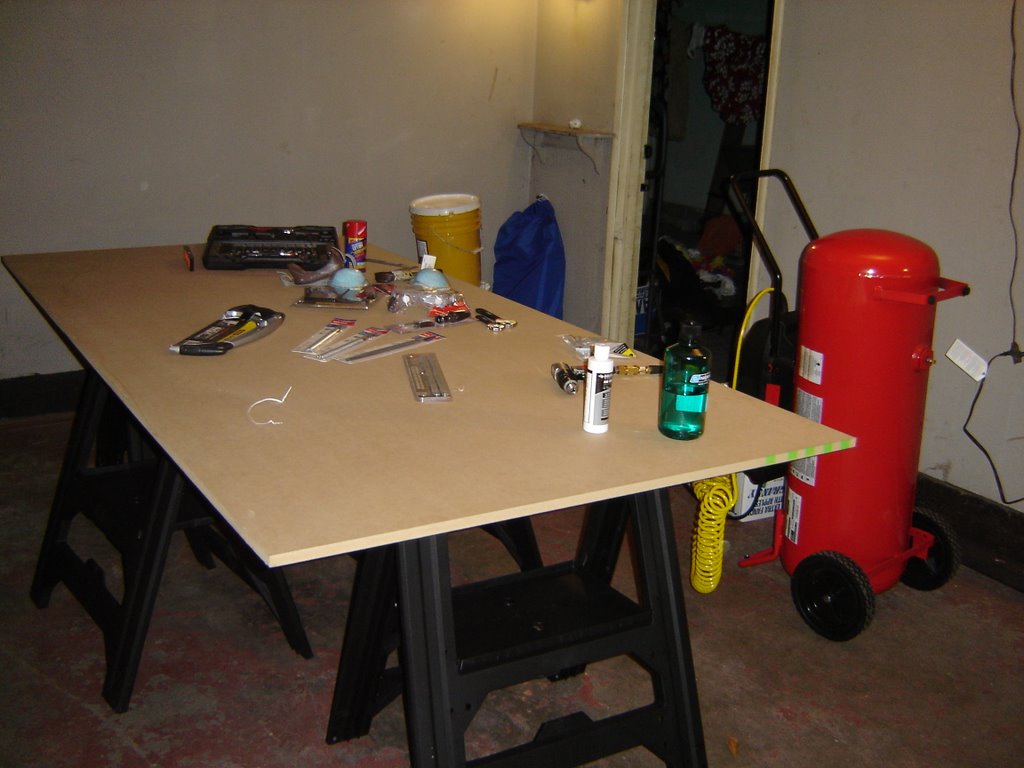
After much unpacking we finally got started on the workshop tonight. A few hours of cleaning a prep found a few issues that need to be resolve. The largest is the need for two more saw horses to provide the flattest most stable workbench possible. A storm drain in the center of the garage is causing un-evenness. Next to that is the need for more lighting and finally tool organization. While not pretty, and far from part 23 certified, this space will work.
About addons: I forgot the order the electric trim tab option kit for the elevator. After talking to the good folks at Zenith the determination was made that everything is OK. The kit is designed to be easily fitted or retro fitted AFTER the elevator is assembled, so no horkage has ensued.

Here now is the list of intended option kits that I need to remember to order:
  • Nav / strobe light kit
  • Electric tim tab
  • Bubble doors
  • Cabin heater kit
  • Amphibious ( trike style ) floats

Wednesday, June 07, 2006

While waiting for the elevator and horizontal stab sub-kit to arrive I found a rather unique flying video. This is not the sort of flying I would ever do, but is it ever cool.


Non embedded link: http://www.youtube.com/watch?v=PmZyB_ghpa0

Project Status:
Rudder Done : ~16 hours spent

Monday, June 05, 2006

Getting a workshop setup is not cheap.

Taking QSP's workshop was great for two reasons: 1) I found out that I could do this project 2) All tools required were provided.

My first trip to the tool store resulted in a Husky brand air compressor, a drill and a few other odds and ends. About $400 in total

The second trip resulted in
  • paint thinner for getting stickers off the parts
  • 2 4'x8'x3/4" boards
  • 4 saw horses
  • a metric measuring tape ( 16' )
  • square
  • flat, half round and round metal files
  • hand hack saw for metal
  • various drill bits
  • lighting for the garage / workshop
  • other stuff I'm forgetting
That was $306 worth of tools. In addition I ordered a pneumatic riveter, a hand riveter, two cleco pliers and tons of clecos from Zenith that will arrive with the tail section sub kit.

My expectation is to have spent at least $1000 in tools before the plane flies.

Sunday, June 04, 2006


Snoqualmie falls from 2500MSL.

One of the joys of aircraft ownership is to take a spin anytime you like. Today we spent 1.4 hours chasing scenery in the 150M.

Starting at BFI we worked our way to Snoqualmie Falls, north to Monroe and then back to Boeing Field... a trip that in a car would have taken at least 3 hours and not have been nearly as scenic.

Friday, June 02, 2006

This is a builder's blog for a Zenith CH701 with amphibious gear.


The idea is to create a builder's log suitable for the certification process for an experimental, amateur built aircraft as required by the FAA.

I am not expecting people to find this blog or even read it, but please prove me wrong people, prove me wrong. Many other people have web pages dedicated to their homebuilt project, but I believe this may be the first actual blog.

Project status:

Currently the rudder is complete. I attended an introductory workshop at Quality Sport Planes and completed the rudder on March 19th, 2006 after two days of work. A workshop is being prepared with lighting and tools, with the remaining tools in shipment from Zenith Aircraft.